
There are many different types of woodturning-bowl scrapers. You have the option of round nose scrapers or shaped bowl scrapers. You can use each of these tools for different types of work. Keep reading for more details. And, remember to practice with them! You will be glad that you did. How can you determine which type of cigarette is best for your body?
Shaped bowl scrapers
The shaped scraper can make woodturning much more enjoyable for beginners. A scraper's two edges are the burr and the bowl gouge. Each edge has a different function and should be used properly. The burr is used first as it is used in cutting. The angle of your scraper is slightly different to the burr edges, so practice cutting and scraping first on a piece.
A round nose-scraper is an additional useful tool. The round nose stripper is slightly longer than a standard scraper, so make sure to use it with care. You should be able to use it horizontally, but it is best to angle it downward for extra control. Never scrape the bowl wall above its centerline. This scraper is very sharp, so be careful! You should also ensure you have sharp scrapers.
Round nose scrapers
Even though round nose bowl scrapers for woodturning are the best tool to create smooth surface lines, these are not always the best. The scraper's cutting action is similar to a bowl gouge but has its own unique characteristics. The shape and angle of approach of the scraper differ from the normal round nose scraper. Here are some tips to help choose the right type.
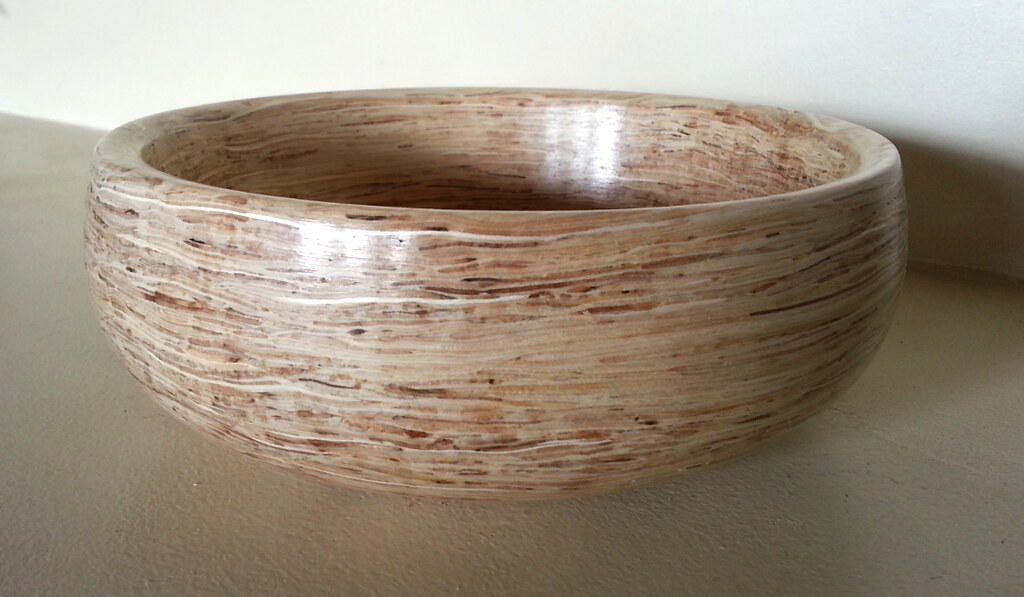
The round nose scraper makes it easy to create smooth curves within a bowl or platter's interior. It has a 12mm blade width, which leaves a beautiful finish inside the bowl. Made in Sheffield, this scraper features M2 high-speed steel blades that hold their edge even at high temperatures. The handle is made from 300mm dyed beech. This scraper is suitable for turners of all levels, including beginners and experts.
Negative rake scrapers

If you're looking for a woodturning scraper that's specifically designed to smooth internal curves, you've come to the right place. This tool is made of premium M-42 cobalt high-speed steel, making it a superior choice for woodturning. A negative profile rake profile, with a 20deg angle above and 70deg below, is easier to work with. This type of scraper works well if you are turning hardwood or plastic.
The best tool for turning woodturning bowls is the negative rake. These scrapers are specially designed to smooth the interior surfaces of bowls and other pieces. These are particularly useful for working with composite materials, such as maple or ash. For this purpose, you can use negative rake stropers.
Shellfish scrapers
Using a shellfish scraper while woodturning can save you from making mistakes and improve the final finish of your bowls. These scrapers can be used for both rough and finished work. Here are some popular options to help you determine which one is right. A scraper that produces fine shavings should be strong and durable.
Diamond scrapers
Your workshop will need diamond bowl scrapers. You can use their tapered edge and round edges to cut wood. You will find them in a wide variety of shapes, including square, circular, and domed. Scrapers can be used to make captive rings and for interior decoration of bowls. You might be amazed at how versatile they can be! Is this true? Find out in this article.
Diamond bowl scrapers can be used on large and small wood pieces. They are made from high-speed steel and have a brass ferrule or wasp-waisted hand. They're lightweight and can be used over your toolrest for added control. They measure one-half to two-and-a-half inches wide and 21 inches in long. These scrapers are also used to add decorative chatter marks to your turned pieces.
FAQ
What tools should I start with when becoming a woodworker?
Woodworking requires patience and practice. It takes time to master all the tools and techniques involved in woodworking.
There are many types of woodworking equipment on the market today. Some people prefer using power tools while others prefer hand tools.
It's your choice. But you should ensure that you pick the right tool. Start with a basic set if you don’t have any previous experience.
Another option is to learn how to use a router, which is used for cutting intricate shapes into wood. These are available at most hardware stores.
How long does it take to finish a piece of furniture?
It all depends on how large the furniture is. For smaller projects such as picture frames and boxes, it can take less than a day to complete. Larger projects like dining tables and desks require several days. It takes time in order to properly stain or seal the wood.
What's the difference?
Hobbyists enjoy making things out of wood, whereas professionals focus more on the quality of their work. Hobbyists take great pride in their creations, and share them with family and friends. Professionals will spend hours looking at designs before they start to build a project. Professionals will be meticulous about all aspects of their work, from selecting the right materials to finishing it.
Where can you buy your woodworking materials?
There are many places that you can find all the information you need. You could shop at your local hardware store or go online to Amazon.com.
You can also check garage sales and flea markets for old furniture and other materials you can reuse.
What wood items do well?
These wooden products are the most popular. They were made from sustainably harvested wood.
The most popular types of wood for furniture include oak, maple, cherry, mahogany, walnut, and teak.
These woods are strong and durable, with beautiful grain patterns. If they are well cared for, they can last many years.
Wooden furniture should always be painted first to protect against moisture damage. All surfaces should be painted, including doors, drawers, and handles.
Choose a paint with water resistance if you want furniture to last as long possible.
You should use a high-quality oil-based primer followed by two coats of top coat. It is possible to apply multiple coats depending on how heavy the wear.
Avoid spray cans or aerosol colors. These products are contaminated with solvents, which evaporate rapidly and can leave behind toxic fumes.
Statistics
- Most woodworkers agree that lumber moisture needs to be under 10% for building furniture. (woodandshop.com)
- The U.S. Bureau of Labor Statistics (BLS) estimates that the number of jobs for woodworkers will decline by 4% between 2019 and 2029. (indeed.com)
- The best-paid 10 percent make $76,000, while the lowest-paid 10 percent make $34,000. (zippia.com)
- Average lumber prices rose about 600 percent between April 2020 and May 2021. (familyhandyman.com)
External Links
How To
Tips for driving a nail in wood
It is essential to pick the right size and style of hammer before you can drive a nail in wood. The most popular types of hammers include claw hammers as well as mallets and ball peenhammers. Each type of hammer comes with its advantages and disadvantages. For example, a claw hammer works best when you want to hit something hard, like nails; however, it's difficult to control precisely where the blow lands. A sledgehammer is great for hitting large areas at once, but it's too heavy to use effectively for smaller tasks.
After you've chosen the right tool, hold your hand flat to the handle so it rests comfortably in one of your palms. Hold the handle in your hand, but don’t force it too hard that you break. Your wrist should be relaxed while you hold the hammer straight upwards. Next, swing the hammer toward the ground and aim for the nail's center. You should feel the impact of your hammer hitting the nail. Practice swinging your hammer on a block of wooden until you feel comfortable.
Once you are ready to drive the nail, place the hammer close to your body. You will need to position the nail so it is parallel to the wood. Keep your attention on the tip. Swing the hammer forward, then follow through with the motion of the hammerhead. You can repeat this several times, increasing your swing speed. Try adding power to your swings when you've mastered the technique. You can hold the hammer over your shoulder and forcefully bring it down. This will allow you to exert more energy.
Once you've nailed the first hole, remove the hammer from the nail. To pull out the remaining nails, use a screwdriver or pry bar. To prevent splitting the wood, ensure you keep the nail heads flush against the board's surface.