Do you have problems with the tension of your scroll saw blade? It's not uncommon. Many people struggle to determine the right blade tension for their scroll saw's flower patterns. This article will discuss blade tension, stack cutting, the Workpiece Foot lock, and how each component of the scroll see is identified. You'll be able to identify each component of the scroll saw and adjust the tension to create flower patterns by the end.
Adjusting the blade tension to create scroll saw flower designs
It is important to choose the correct blade for your scroll saw and adjust the tension. If these factors aren't adjusted correctly, the scroll see will not function properly and won't cut the wood. You can have any type of blade, but the tension should be set to match the design. The tension setting is often adjusted by scroll saw manufacturers. For the best instructions, consult your manual. These are some useful tips.
First, ensure your table is square. This can be done with a small square, or a protractor. Moreover, the scales on your scroll saw's blade-tilt will not be accurate. It is important to check the scales on your scroll saw's blade-tilt regularly. You can start cutting flower patterns once you have adjusted your blade-tension. Be sure to not make the blades too tight.
Stack cutting
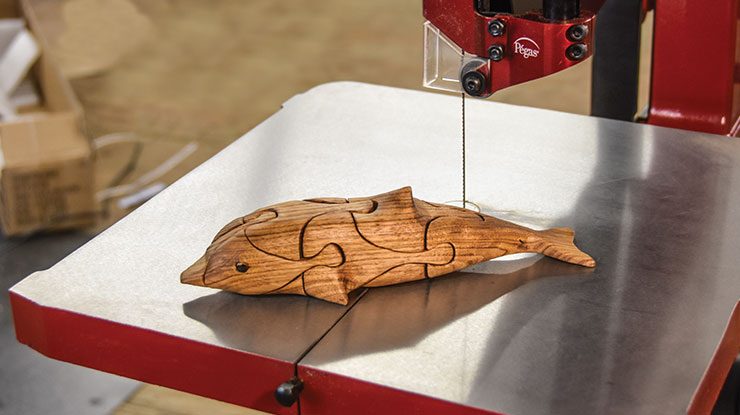
First, stack a few pieces together of wood to make a scroll saw floral pattern. Double-sided tape is used to secure the pieces. To secure their stacks, some scrollers use toothpicks or small nails. Binding tools can also be used with staples or an old circular saw blade. This will stop the layers from shifting. After each layer has been attached, you can start cutting.
For more precise cuts, consider using magnification. It is possible to mount a magnifying glass on the scroll saw, or use a lens for your tool. For a better illumination of your work area, you can consider purchasing a magnifying led work light. Some work lamps have a magnetic or clamping base, which makes it easier to move your work space. There are many types of scroll saws available. Find the right one for you.
Locking workpiece foot
There are many options to choose the right drop foot that will fit your scroll saw. The foot should be positioned on the workpiece, and it should not drag. Ensure that the workpiece foot lock is tightened after each adjustment. Next, adjust your speed dial to the desired setting. It will depend on how thick the material is and how many teeth it has. Finally, secure the workpiece in the drop foot.
Scroll saws might not be right for every job. These scroll saws are for specific jobs. To cut a flower pattern out of wood, use the workpiece footlock to keep it from moving while you're cutting. This will prevent your workpiece from moving as you cut. Also, consider the amount of weight that you plan to use for the cut. If you plan to cut large flowers, you might want a larger blade.
Identifying the parts in a scroll saw
Scroll saws are classified according to their throat size. This measure is the distance between a scroll saw's blade and its rear frame. The throat size is a measure of how big wood can be cut. The throats of smaller saws are shorter, while those of larger size have deeper throats. Before the advent of computer automation, industrial saws were used to cut larger items. A basic scroll saw is sufficient for most home projects.

Download a free pattern for a flower scroll saw if your not sure how to start a project. These patterns include detailed instructions on how they should be built. They are very simple to follow, and can be made into beautiful decorations. They can be used in your classroom, kitchen or as decorative items. You can also make practical items with scroll saws. It can be difficult to identify the parts of a scrollsaw flower pattern, but it is possible!
FAQ
What tools work best for me?
It's important to consider your preferences and needs when buying tools. Are you more comfortable with plastic or metal handles? What size nails and screws do you usually use? Are you comfortable with power tools, or would you rather use hand tools?
Where can you find free woodworking blueprints?
Free woodworking plans are available online. You don't even need to buy books or magazines. Search Google for free woodworking plans. Just enter "free woodworking" into the search bar, and you'll see hundreds of websites where you can download free plans.
How much should a woodworker charge per hour?
Hourly rates for professional woodworkers vary depending on many factors such as skill, experience, availability, geographical location, and other variables.
An average hourly rate for skilled woodworkers ranges between $20-$50.
A less skilled woodworker can charge as low at $10 an hour.
What tools are best to begin with when I become a woodworker
Woodworking takes practice and patience. Learning how to use the various tools and techniques necessary for woodworking takes patience.
There are many kinds of woodworking equipment currently on the marketplace. Some prefer to use power tools and others prefer hand tools.
Your choice, however, is up to you. However, you need to ensure that the tool you use is the right one for the job. You might start with a simple set of tools if you don't have much experience.
You could also try learning how to use a router which is used to cut intricate shapes into wood. These can be found at most hardware shops.
Can I make a living doing this?
Yes! In fact, many woodworkers already do. According to the U.S. Bureau of Labor Statistics, the median annual woodworker wage was $34,000 in May 2012. This is more than the national average of 31,000 per annum.
Which wooden items are very popular?
Wood that has been harvested sustainably is the best-selling type of wood.
Oak, cherry and mahogany are the most sought-after wood types for furniture.
These woods are very strong, but they also have beautiful grain patterns and colors. They also last for many years if cared for properly.
To prevent moisture damage to wood furniture, it is important that it be painted before any other surfaces. This applies to all surfaces, even drawers and doors.
Paint that is water-resistant will ensure furniture lasts for a long time.
Use a high-quality, oil-based primer and two coats of topcoat. Depending on how often it will be worn, you may need to apply several coats.
Avoid spray cans or aerosol colors. These products are contaminated with solvents, which evaporate rapidly and can leave behind toxic fumes.
Statistics
- If your lumber isn't as dry as you would like when you purchase it (over 22% in Glen Huey's opinion…probably over 10-15% in my opinion), then it's a good idea to let it acclimate to your workshop for a couple of weeks. (woodandshop.com)
- In 2014, there were just over 237,000 jobs for all woodworkers, with other wood product manufacturing employing 23 percent; wood kitchen cabinets and countertop manufacturing employing 21 percent. (theartcareerproject.com)
- Average lumber prices rose about 600 percent between April 2020 and May 2021. (familyhandyman.com)
- Overall employment of woodworkers is projected to grow 8 percent from 2020 to 2030, about as fast as the average for all occupations. (bls.gov)
External Links
How To
How to stain wood
The process of staining wood involves the application of chemicals to the wood's surface, which causes it to change its color. This chemical reaction causes the wood color to change from white and brownish red. Oak is the most common wood type for staining. However, you can also use other wood types.
There are many options for applying stains to wood surfaces. You can mix the stain with a solvent, such as turpentine, and spray it onto the wood. Another method involves applying a solution of water to the wood. It is possible to mix stain into varnishes and paints, making it part of the finishing coat.
Preparing the surface is the most important step in staining wooden surfaces. The wood must be thoroughly cleaned to remove all grease and dirt. Sanding smoothens scratches and rough spots. The next step is to choose the stain type you want. There are two main types of stain: non-penetrating and penetrating. Penetrating and non-penetrating wood stains penetrate deeper than other types, making them perfect for dark colors like mahogany. Penetrating stains are best paired with lighter colors, such as maple.
After deciding on the type of stain, you want to apply, prepare your tools. Because you can spread the stain evenly with a paintbrush, it is ideal for applying them. You should also have some handy rags to wipe up excess stains after you finish painting. If you plan to mix the stain yourself, make sure you have enough containers available to hold the different components of the mixture.
Once you have prepared all your materials, it is time to clean the areas where you will stain the wood. Use soap and warm water to remove dust and grime. Wipe the entire piece of furniture with a rag dampened with clean water. You should remove any debris, especially if your plan is to stain darker wood.
Apply the stain. The stain can be applied by spraying or brushing the stain onto one end of the furniture. You should work slowly and carefully. Continue moving along the grain until you reach your opposite end. You must be careful not to allow the stain to drip off the wood's edges. Let the stain dry completely before proceeding with the next steps.
A coat of clear polyurethane sealing agent is applied to protect the paint. Three coats are recommended for polyurethane. Allow the third coat to dry overnight, before sanding.