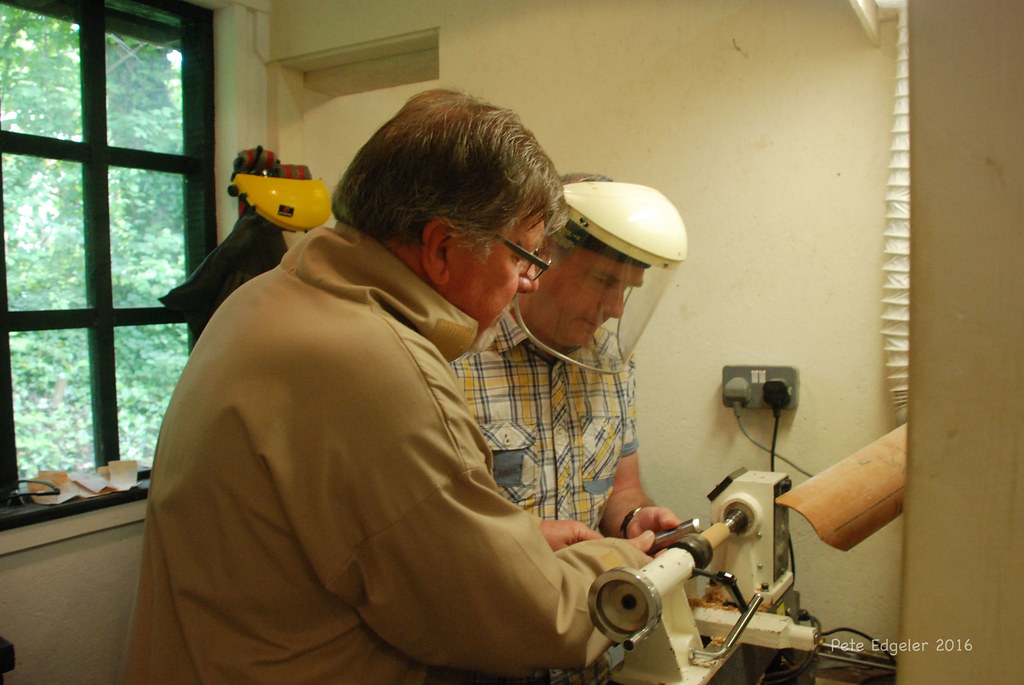
Although spindle turning may seem simple at first, it involves several fundamental concepts. Nick Cook, a professional spindle turner, shares these guidelines to help you achieve the best results. Never go too high on the spindle. This can lead to many catches and potentially disastrous results. Also, ensure that your tool rest is the same height as your tools. Thinner tools require a larger tool rest than thicker tools. Cut above the center and you should avoid any catches.
Tools
There are many tools you can use to help with spindle turns. For this task, a spindle gouge and a skew-chisel are essential. For turning spindles, you can use either one of these tools. Each tool has a unique design that can handle different profiles. So make sure you get the spindle guage that is right for you. For a more precise turn, use a skew chisel to turn a beaded pommel.
Materials
A spinning tool requires a combination of several tools in order to produce the finished product. Most types of workpieces can be turned using a spindle turner. The spindle's hole diameter (or diameter) indicates the maximum size that a workpiece can pass through. A minilathe's diameter for the spindle hole is 3/4", but it can easily be reamed up to 13/16". The front of the hole is tapered for the tooling.
Rosewood
Rosewood spindles can be used for woodturning projects if you are interested in this type of work. The exotic hardwood can be found in a variety of stunning colors as well as a natural glow. This wood is easy to turn on a lathe and the three-inch square blanks make it ideal for short spindle turning projects. You might be interested in a more challenging wood like Patagonian Rosewood.
Hickory
Hickory is an excellent choice if you're looking for a wood that can be used to make spindles. It can be challenging to work with this type of wood by hand but once you get the hang of it, you'll enjoy the rustic beauty of your creations. In addition to being tough and resilient, hickory is also a favorite of many woodworkers for its open grain and colory variation.
Hardwoods
Think about the type and purpose of your spindle turning when selecting woods. There are many hardwoods that you can choose from. You can purchase spindle blanks already turned but you need to select the best ones. It is best to choose hardwoods that are easily regenerated, such as cherry, maple, ash, or ash. This will ensure that you can continue to turn them as you need to. The woods used for spindle turns can be quite hard but will give you a strong foundation for your final product.
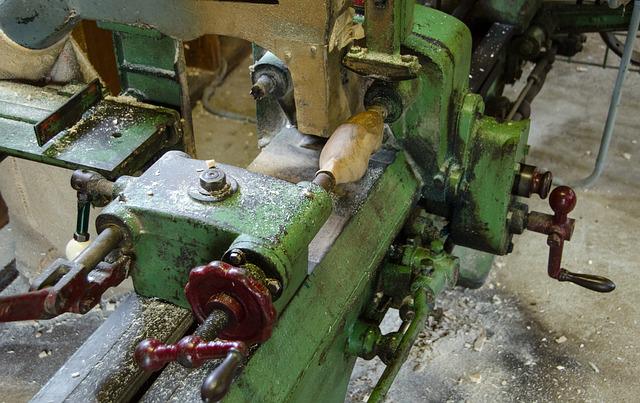
Woodturning machines
When shopping for a spindle-turning machine, the first thing you should consider is its size. Woodturning tools tend to be heavy. The larger the spindle turning machine, then the heavier it will be. The edge of the tool is another thing to watch out for. The less likely it is to grab the wood, the smaller the edge of the tool. Because of this, cutting downhill is more difficult and can cause your tool to grab the wood and pull it off the table.
FAQ
How can a beginner woodworker make money?
Many people are starting to learn how to build furniture because they want to start an online business. If you are just starting to build furniture, there are many other ways to make money than selling on Etsy. You could sell at craft fairs or local events. For those who want to build their own furniture, you might offer workshops. You might be able to offer services like remodeling homes or making custom pieces for clients if you are a skilled carpenter.
Which material would you recommend for woodworking lessons?
Start with softwood like pine, poplar and ash. After you are comfortable with the softwoods, move to hardwood.
What is the minimum amount I will need to start?
Since every project differs, it is impossible to give exact numbers. These are the factors that will give you an idea of how much you'll need.
-
Material costs
-
Tools and equipment
-
Time spent working on the project
-
Your hourly rate
-
What amount of profit can you expect to make?
-
Whether you plan to hire help
You might start small if you are just starting out. As you gain more experience, you will be able tackle more complicated projects.
How can you calculate woodworking pricing?
The most important thing to remember when calculating costs for any project is to keep them as low as possible. You should always try to make sure that you are getting the best deal on materials. It is important to take into consideration all factors that can impact the cost of your projects. These include time, skill and experience. Our guide to the average household DIY task price will give you an idea of how much it costs to complete different types of woodwork projects.
Do I need to be a genius to succeed in woodworking?
No. Woodworking is not difficult. It is possible to learn basic tools and techniques that will allow you to create beautiful art.
How can I learn basic skills in woodworking?
The best way to learn how furniture construction is to make your own bench. This project can be completed with whatever wood you have available at home. If you're not sure which kind of wood to choose, you can purchase cheap pine boards at Lowes and Home Depot. You'll need to sand the bench after it's built. Then, finish it with varnish or a stain.
How can I determine which tools are most suitable for me?
It helps to reflect on your needs and preferences before you shop for tools. Do you prefer metal or plastic handles What size screws and nails do you use most often? Do you prefer to use hand tools or power tools?
Statistics
- Overall employment of woodworkers is projected to grow 8 percent from 2020 to 2030, about as fast as the average for all occupations. (bls.gov)
- The U.S. Bureau of Labor Statistics (BLS) estimates that the number of jobs for woodworkers will decline by 4% between 2019 and 2029. (indeed.com)
- If your lumber isn't as dry as you would like when you purchase it (over 22% in Glen Huey's opinion…probably over 10-15% in my opinion), then it's a good idea to let it acclimate to your workshop for a couple of weeks. (woodandshop.com)
- In 2014, there were just over 237,000 jobs for all woodworkers, with other wood product manufacturing employing 23 percent; wood kitchen cabinets and countertop manufacturing employing 21 percent. (theartcareerproject.com)
External Links
How To
How to stain wood
Staining wood refers to applying chemicals to wood's surface. This chemical reaction causes the wood to change in color. This chemical reaction changes the wood's color from white to brownish. Oak is the most common wood type for staining. However, you can also use other wood types.
There are many options for applying stains to wood surfaces. Mixing the stain in a solvent such as turpentine and spraying it onto the wood is one method. Others use a solution made up of water and dye, which is then applied directly onto the wood. Stains can also be mixed into paints and varnishes, becoming part of the finish coating.
The first step in staining wood is preparing the surface. The wood must be thoroughly cleaned to remove all grease and dirt. Sanding can smoothen out scratches and uneven spots. Then you must decide what kind of stain you want to use. There are two types of stains that can be used: penetrating and non-penetrating. Penetrating stains penetrate deeper than non-penetrating stains, which makes them great for dark colors like mahogany. The best non-penetrating colors are those that work with light colors like maple.
You will need to decide on the type of stain you want to use, and then prepare your tools. Paintbrushes are great for applying stain because they allow you to evenly spread the liquid across the surface. You should also have some handy rags to wipe up excess stains after you finish painting. If you plan on mixing the stain yourself make sure that you have enough containers to hold the different components.
After you have prepared your materials for staining, clean the area. Use warm water and soap to clean away dirt and dust. Use a dampened rag and clean water to wipe the furniture. Make sure you eliminate any loose debris, especially if you plan to stain darker wood.
Next, spray the stain. Begin at one end and spray or brush the stain on the wood. Slowly and carefully work your way along the grain to reach the opposite end. Keep the stain from dripping off the wood's surface. Before you proceed with the next steps, let the stain dry completely.
To protect the painted surface, apply a coat of clear polyurethane sealant. Apply three coats of polyurethane sealer. Allow the third coat, which should dry overnight, to dry before sanding.