This guide is for those who are interested in intarsia-wood art. The information presented here covers Wood types, Patterns, Tools, and Techniques. Continue reading to learn more about this fascinating craft. Depending on how skilled you are, you might be interested in working with a different variety of wood. For those who are just starting out in this craft, it is a good idea to make a sample.
Patterns
Woodworkers who are skilled can make many intarsia projects including holiday, tree and flower ornaments. The book's intarsia wood pattern pages are suitable for all levels of experience and demonstrate the artistic nature of the process. You will find 21 intarsia patterns that are full-size, along with helpful information about shaping, blades, and wood.
Intarsia allows you to create an original piece of furniture, or wall hangings by using different wood species. It's like building a puzzle, with different pieces of wood arranged next to each other. The wood is then polished or stained, and each piece is assembled to create a unique design that adds depth and character to the finished project. Making intarsia wood patterns can prove difficult so it is important to locate a source of free patterns.
Tools
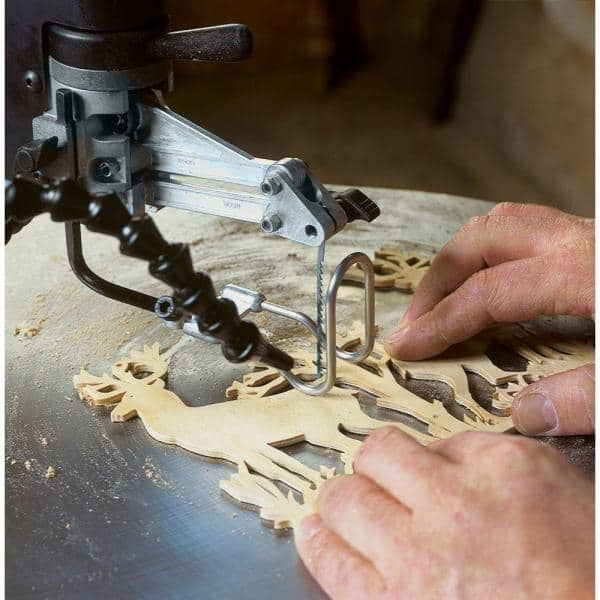
To create the best intarsia, you will need to use special tools for intarsia wood. A small belt grinder is a good tool to quickly remove materials and smoothen the edges. A dremel and flex shaft are useful tools to shape or sand small details. You will find different tools and blades for shaping small areas.

Jigsaw: Jigsaws can be used to cut wood but not in the same way as a scrollsaw. Sanders are required to smoothen wood surfaces. Two types of wood are required for intarsia woodworking. They must have different colors and grains. The wood will then be stained differently. The wood will then be cut and sanded in order to create a mosaic design.
Techniques
Creating stunning intarsia pieces is not as difficult as it looks, as long as you follow the right techniques. A pattern can be a great starting point to your artistic creativity. These ideas will help you create stunning intarsia art. These are some examples of techniques:
First, pick the project design. Print out additional copies of your design. Next, decide which species of wood to use. Different wood species are different. You can give your project more depth and dimension by reducing the thickness of each piece. You can also add pieces by glueing on additional layers of wooden. You can finish your project by taking off any extra backing.
Woods to use
No matter whether you are just starting out with inlaid wooden work or have been doing it for years, this book will teach you how to create beautiful pieces that stand apart. Kathy's progressive teaching method will guide you through everything, from the basics up to the nuances and color breaks. You'll be referring to this book even if you have never made intarsia before.
First, choose woods that complement one another and have the same grain orientation. A teddy for example requires 20 pieces of wood made from four different types of wood, each with a slightly different grain. A saw with a high speed blade is required. Once you've figured out the wood's color and grain orientation, you're ready to move on to cutting and staining.
Colors

The intarsia pieces come in a wide range of colors. While saps and heartwoods are either reddish brown or grey black, they are both white. Cherry is one example of a wood that darkens with age. Cherry is a light-colored wood that begins life with a pale tone. It becomes medium-colored as it is exposed to sunlight. Cedar and other woods have different tones. This creates depth for your project.
Intarsia creates patterns by gluing together different pieces. Although it originated in the Islamic world and is now associated with Italy, it has been a popular art form for many years. Woodworkers create a three-dimensional illusion by using different wood colors with varying thicknesses. You will often find intarsia on jewelry boxes, wooden chests and keepsake boxes.
This is a slow process
The intarsia process is a complex one, involving the use of different types of wood and staining techniques. Artists need to collect different types wood and stains to make beautiful intarsia patterns. There are two types of wood that are most commonly used: plywood and birch. But there are many other options. The choice of wood an artist uses is completely dependent on the individual preference. Intarsia projects are often created by craftsmen who prefer Western Red Cedar.
The first step of intarsia woodenworking is to cut the inlay and label it. The artist then glues or adheres the pieces. After the glue has dried the woodworker will finish the piece with a double-bevel inlay. This tedious process takes skill and is truly a work-of-art.
FAQ
Do you know anything more about woodworking?
It is easy for people to overlook the work involved in furniture making. The hardest part of the process is actually finding the right wood. There are so many wood options that it can be difficult to choose the right one.
The problem with wood is that not all wood properties are the same. Some woods will warp and others will split or crack. These factors should be taken into account before buying wood.
How long does a piece take to finish?
It depends on the type and complexity of your design as well as the amount of finishing that you use. Hardwoods require more care than softwoods. Hardwoods can also be more costly than softwoods. They last longer and are more resistant to moisture. The process of finishing a piece of furniture typically takes anywhere from one week to three months.
How does a beginner woodworker earn money?
Many people are beginning to learn how build furniture to launch an online business. However, if you're just getting into furniture building, there are other options than selling on Etsy. You can sell at local craft fairs. Or you could offer workshops for others who want to learn how to build their own furniture. Consider offering your services if you have previous experience as a builder or carpenter.
Where to Buy Hardwood Lumber?
You can buy hardwood lumber at Home Depot. They carry a variety of wood products such as flooring, cabinets, and furniture.
A large variety of engineered hardwoods is available to them, including Ipe (Araucaria Angustifolia), Brazilian Cherry and Peau d'Arco.
These woods can be found online by searching for "hardwood lumber" in Google.
Statistics
- Most woodworkers agree that lumber moisture needs to be under 10% for building furniture. (woodandshop.com)
- If your lumber isn't as dry as you would like when you purchase it (over 22% in Glen Huey's opinion…probably over 10-15% in my opinion), then it's a good idea to let it acclimate to your workshop for a couple of weeks. (woodandshop.com)
- Woodworkers on the lower end of that spectrum, the bottom 10% to be exact, make roughly $24,000 a year, while the top 10% makes $108,000. (zippia.com)
- The best-paid 10 percent make $76,000, while the lowest-paid 10 percent make $34,000. (zippia.com)
External Links
How To
Tips for driving a nail in wood
First, choose the right size and type of tool to drive a nail through wood. There are many types of hammers that you will find: claw hammers and sledgehammers; mallets; ball peen hammers; and hatchets. Each type of tool has its advantages and drawbacks. A claw hammer, for example, is the best choice if you need to hit nails hard. However, it's not easy to know exactly where the impact will land. Although a sledgehammer can be used to hit large areas quickly, it is too heavy to be useful for small tasks.
After selecting the right hammer, you will need to place your hand flat against one side of the head. The handle should rest comfortably in your hands. You can grip the handle with your fingers, but not so tight that it causes injury. Keep your wrist relaxed and the hammer straight up. Now, move the hammer towards the center of the nail by swinging it back. You should feel the impact on the nail from the hammer. Practice swinging your hammer on a block of wooden until you feel comfortable.
When you're ready to start driving the nail, hold the hammer in front of you close to your body. To ensure that the nail is perpendicular on the surface of the wooden floor, position it. Keep your attention on the tip. Swing your hammer forward. Then follow through with the motions of the hammerhead. Repeat this action several times, gradually increasing the speed of the swing. After mastering the technique, you can add power to your swings. You can hold the hammer over your shoulder and forcefully bring it down. This will help you put more energy behind each of your moves.
Once you've made the first nail hole, take out the hammer. To pull out the remaining nails, use a screwdriver or pry bar. Keep the nail heads parallel to the board's surfaces in order to avoid splitting wood.