
It is important to understand which woods are the best for your walking stick before you start carving it. It is also important to learn about different methods for whittling, and the techniques David Allen uses to carve his walking stick. Be sure to check out these famous quotes on walking sticks and how they are made. These are some tips to help you create the perfect walking stick. Continue reading to find out more. You can now carve a walkingstick that will be functional and unique!
Woods that are good for carving walking sticks
The hardest part of carving is finding the right blank. You may come across a few trees with branches that appear bent too far to be useful, but you should keep searching until you find a straight piece. A straight branch can be harvested during winter when the sap is moving from the roots to the branches. This will make the wood more stable, and less likely to split. It's okay to harvest wood while the tree's still green if you cannot wait until spring.
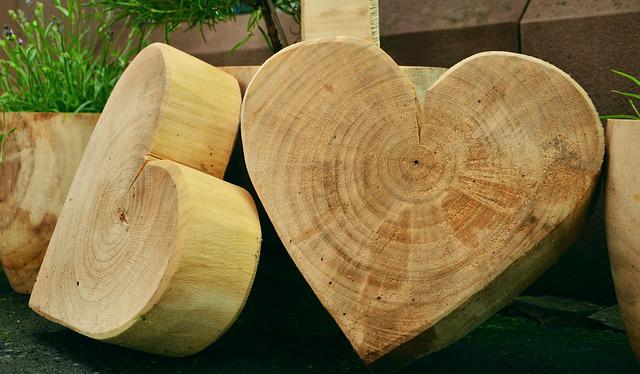
You can use a variety of wood species to carve a walking stick. North American Chestnut is a solid wood. Its density makes it ideal to make walking sticks, and other similar tools. This species' wood grain is either slightly open or partially closed. This wood grain makes a strong walking tool that is solid and smooth. It is also very beautiful and is frequently used in carving. Some species can even be carved with the bark in place.
Techniques for cutting a walkingstick
You can use a few basic methods to carve your walking stick. First, choose a piece with a unique texture. Woods can have unique bark patterns and colors. Other woods may have natural swirls. You might want to paint or lacquer these characteristics. To make the shaft more appealing, you might also carve it. Make sure that the stick you choose is straight, free of branch shoots or hard spikes.
This book will teach you about different wood types and carving styles. Snakes and lions are the most popular designs. Not only can you carve snakes but fish, eagles, and even deer. These artists are often regarded as God-given. This book is for both the beginner and the expert carver.
David Allen uses these tools when carving a walkingstick
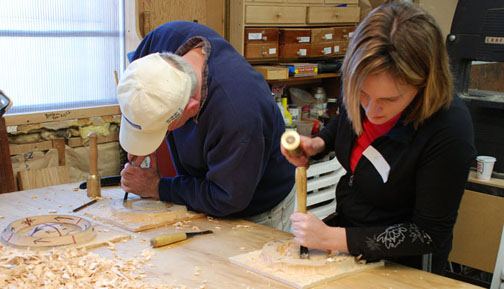
David Allen started making toys when he was young. He used a pocketknife from his childhood to create them. He was too young to be able to use a knife so he kept it safe from his family. His creations include toys such as slingshots and utilitarian items like shoeshine box. Allen was 15 years old when he became disabled and started carving walking sticks. Allen used a pocketknife and chisel to carve out the wood.
Allen created his designs by himself, digging around sapling roots and then deciding what to carve. Allen believed that a design must "see" itself before it can be carved. This was the same process as many other African-American artists. Allen often had visions and dreams about the design he wanted to carve. Allen was able to create a stick with the right emotions and sentiments for his community.
Famous quotes about carving a walkingstick
Carving a walkingstick is a complicated process and requires a blank. The most difficult part is to find a straight blank. There are many options for where to get your stick. However, you need persistence to find the right one. Although it may look bent beyond practical utility, you can keep looking until you find one. You should try to cut your stick at the time sap flows from the tree's roots to its branches. Sap makes wood more flexible and less likely to break.
The wood's texture, color and grain are important considerations when selecting wood. Each piece of wood may have unique textures and colors. These natural swirls will be enhanced by a coat of lacquer. A smooth finish is possible by choosing a wood shaft that is free from branch shoots and tough spikes. This will make the process much easier. You should consider what type of finishing you will use, regardless of the material.
FAQ
How can I determine which tools are most suitable for me?
It helps to reflect on your needs and preferences before you shop for tools. Are you more comfortable with plastic or metal handles? What size screws or nails do you prefer? Would you rather use hand tools than power tools?
Where can I locate free woodworking plans
You don't need to purchase any books or magazines to find free woodworking plans. You only need to Google search. Just enter "free woodworking" into the search bar, and you'll see hundreds of websites where you can download free plans.
What is the main difference between plywood or particle board?
Plywood is a combination of layers of wood, which are then pressed together under high pressure. Plywood comes with a range of thicknesses, and it is most commonly used for flooring and cabinets. Particle board is made up of sawdust mixed in resin, then compressed into large pieces. It's commonly used for home improvement projects. Both boards can be cut easily and are both durable.
What material would you recommend to start learning woodworking?
You can start with softwoods like pine or poplar. These two are the easiest to master, then you can transition to hardwood.
Do I need to be a genius to succeed in woodworking?
No. Woodworking does not require any special skills. To create stunning works of art, anyone can learn to use basic power tools.
What is the minimum amount I will need to start?
Because every project is unique, there aren't exact numbers. But if you want to get an idea of how much money you'll need, consider these factors:
-
Cost of materials
-
Tools and equipment
-
Time spent working on this project
-
Hourly rate
-
What is your expectation for profit?
-
No matter if you are looking to hire someone
For those just beginning, it may be a good idea to start small with simple items like boxes and picture frames. You will gain more experience and be able to tackle larger projects.
You can learn how to woodwork.
The best way to learn anything is by doing. Woodworking requires patience, practice and skill. Every craft takes practice and patience.
You can learn the most effective way to master a skill is by actually doing it. So start small and build on what you have learned from there.
Statistics
- Woodworkers on the lower end of that spectrum, the bottom 10% to be exact, make roughly $24,000 a year, while the top 10% makes $108,000. (zippia.com)
- Average lumber prices rose about 600 percent between April 2020 and May 2021. (familyhandyman.com)
- If your lumber isn't as dry as you would like when you purchase it (over 22% in Glen Huey's opinion…probably over 10-15% in my opinion), then it's a good idea to let it acclimate to your workshop for a couple of weeks. (woodandshop.com)
- Overall employment of woodworkers is projected to grow 8 percent from 2020 to 2030, about as fast as the average for all occupations. (bls.gov)
External Links
How To
Here are some tips on how to drive nails in wood
First, choose the right size and type of tool to drive a nail through wood. The most commonly used types of Hammers are claw hammers. Each type of hammer comes with its advantages and disadvantages. A claw hammer, for example, is the best choice if you need to hit nails hard. However, it's not easy to know exactly where the impact will land. A sledgehammer allows you to hit large areas simultaneously, but it is too heavy and cumbersome to use for small tasks.
Once you have chosen the right hammer for you, put your hand flat against its side so that it rests comfortably in the palm of your hand. Hold the handle in your hand, but don’t force it too hard that you break. Keep your wrist relaxed and the hammer straight up. You should then swing the hammer straight up, keeping your wrist relaxed. The impact of the hammer hitting the nail should be felt. If you're having trouble getting the hang of swinging a hammer, practice with a block of wood until you get the rhythm down.
You can now drive the nail by holding the hammer to your body. The nail should be perpendicular to wood's surface. Keep your eyes focused directly on the tip of the nail. Move the hammer forward and then continue to move the hammerhead. You can repeat this several times, increasing your swing speed. Once you've mastered the technique, try adding power to your swings. Then, raise the hammer from your shoulder to bring it down. This will help you put more energy behind each of your moves.
Once you have successfully drilled the first hole in the nail, remove the hammer. You can then remove the rest of the nails using a prybar or a screwdriver. Keep the nail heads parallel to the board's surfaces in order to avoid splitting wood.